
Advertisement
Article Posted by: Mark Alonzo
In this article we will discuss on how to remove pimples, black and white heads, scars
or anything that is unwanted part of your skin. So as you can see here are the two examples a person having an acne on her face.So in this case we will use
CLICK THE VIDEO TO PLAY


Step 1:
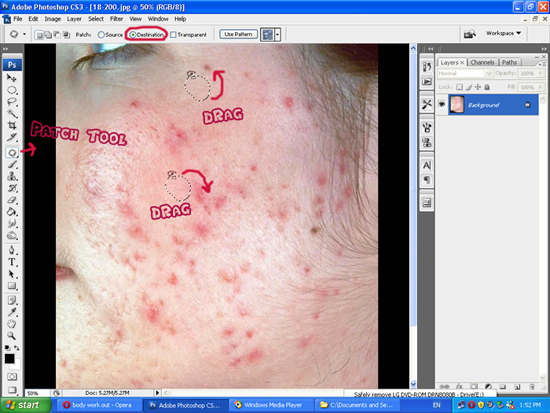
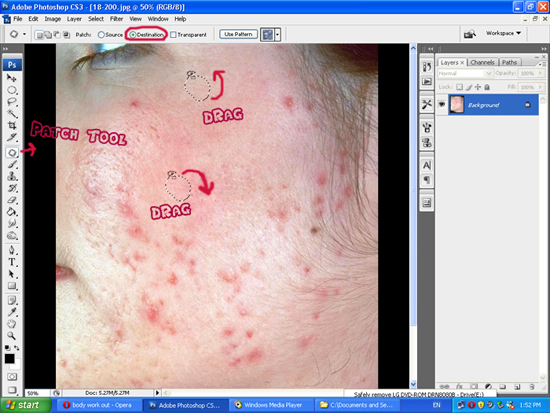
The first thing you do is browse then select the image where it locates to your computer drive and then open up with photoshop. So with this click on the File the menu on the top then select Open. When the image is already been loaded select Patch tool under tool brush. Next select Destination on the menu bar be sure you have already uncheck the Transparent. Now as you can see on the image i have encircled the part of the face where it locates near the a single pimple where i named DRAG. In that portion after you encircled the clear part your skin then drag to the pimples. And then same with the other pimples. Notice dont encircled clear part of your skin which is far from the pimples and then drag because it has a different skin tone or contrast. It will look different and sharp.
Continue here:
As you can the pimples are suddenly gone after i drag and drop the encircled clear area of the skin drop to the pimples. Same with the other affected pimples and pores it must be done by a Patch tool. So what you gonna do next is repeat the process and then you will see its difference until all pimples are remove.
Step 2:
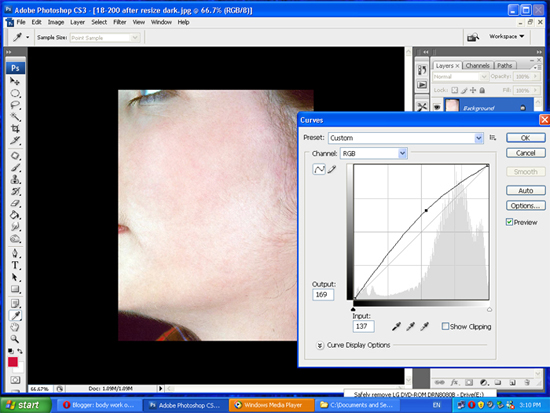
With this process after Patch Tool has done. All pimples are gone but we need to enhance more a little bit with this image so that it will look like a perfect gradient skin. Here is the next thing you do click Image on the menu bar then select Adjustment > Curves for us to enhance the image and looks more white and clear than this. Follow the process below this image.

Continue Here:
So after you have selected the Curves and adjusting the graphs then select Ok button.Adjusting this graphs depends what suits on you wether its higher detail than this image or not. Adjusting this graphs upper the whiter the image. Otherwise it darker when you adjust on a lower.
After adjusting the last part which is Curves then click File on the menu bar then click Save As then name this file on how you name it then adjust the Quality to maximum value 12 for the best result on your image.
Thanks and hope you will learn with this article and lots of tutorials will be published soon. Just keep on visiting my blog and leave comment if you have questions. THANK YOU.
Other way of removing pimples click this blue link below
Advertisement
No comments:
Post a Comment